Making Gelli Prints with Household Items
Inspired by this post (and give-away) from the Gelli Arts blog, I decided to make a few prints using my Gelli plate and ordinary household items. I'm a big believer in using what you have in paper arts, so that post is right up my alley. For my prints, I used plastic wrap, wax paper, bubble wrap, a paper towel tube, and rubber bands wrapped around an acrylic stamping block to create texture.
By the way, if you want to enter the give-away on the Gelli Arts blog, hurry. The deadline to enter is Tuesday, May 26, 2015 at 12:00 noon EDT.
Pictures of the supplies I used and the resulting prints are below.
I used plastic wrap, wax paper, an empty paper towel roll, Golden fluid acrylic paints, and bubble wrap to make my first set of prints from household items.
I did not try to line up the print registration each time I pulled a print, as you can probably see in the photos.
I made another set of prints using heavy-bodied acrylics and a little glazing liquid to keep the paint wet longer. I've found that the fluid acrylics don't necessarily need the glazing liquid. I usually wear plastic gloves to protect my hands. I tend to go from printing to typing to eating, etc. The gloves make handwashing much, much easier.
The glazing liquid shown below helps paint stay wet a little longer. I use the paper towel to clean off my brayer and palette knife. The scratch paper is just ordinary copy paper that I use to roll paint off the brayer. After a printing session, I often keep the paper towels. I iron them between parchment paper and save them for use in future projects.
The series of prints below has a Plan B print as the final layer.
Plan B prints are made by putting a thick layer of white or light heavy-bodied paint onto the leftover paint on the Gelli plate. Do the first pull on copy paper or cheap card stock. The first Plan B print will be all or mostly white paint. The second pull will bring up most of the remaining paint on the plate, including the colors and patterns under the white paint. Plan B prints make a nice final layer or can stand alone. Plan B and ghost prints are often prettier than the first prints, IMO. :)
By the way, if you want to enter the give-away on the Gelli Arts blog, hurry. The deadline to enter is Tuesday, May 26, 2015 at 12:00 noon EDT.
Pictures of the supplies I used and the resulting prints are below.
I used plastic wrap, wax paper, an empty paper towel roll, Golden fluid acrylic paints, and bubble wrap to make my first set of prints from household items.
 |
| Supplies I used for the first series of prints. |
 |
| First-pull prints overprinted on the same sheet of paper. |
I did not try to line up the print registration each time I pulled a print, as you can probably see in the photos.
 | ||
| Ghost prints overprinted on the same sheet of paper. Less paint was on the plate, so the colors were less intense. |
I made another set of prints using heavy-bodied acrylics and a little glazing liquid to keep the paint wet longer. I've found that the fluid acrylics don't necessarily need the glazing liquid. I usually wear plastic gloves to protect my hands. I tend to go from printing to typing to eating, etc. The gloves make handwashing much, much easier.
 |
| Liquitex Basics acrylic paints, my plastic gloves, an acrylic stamping block and rubber bands, bubble wrap. |
The glazing liquid shown below helps paint stay wet a little longer. I use the paper towel to clean off my brayer and palette knife. The scratch paper is just ordinary copy paper that I use to roll paint off the brayer. After a printing session, I often keep the paper towels. I iron them between parchment paper and save them for use in future projects.
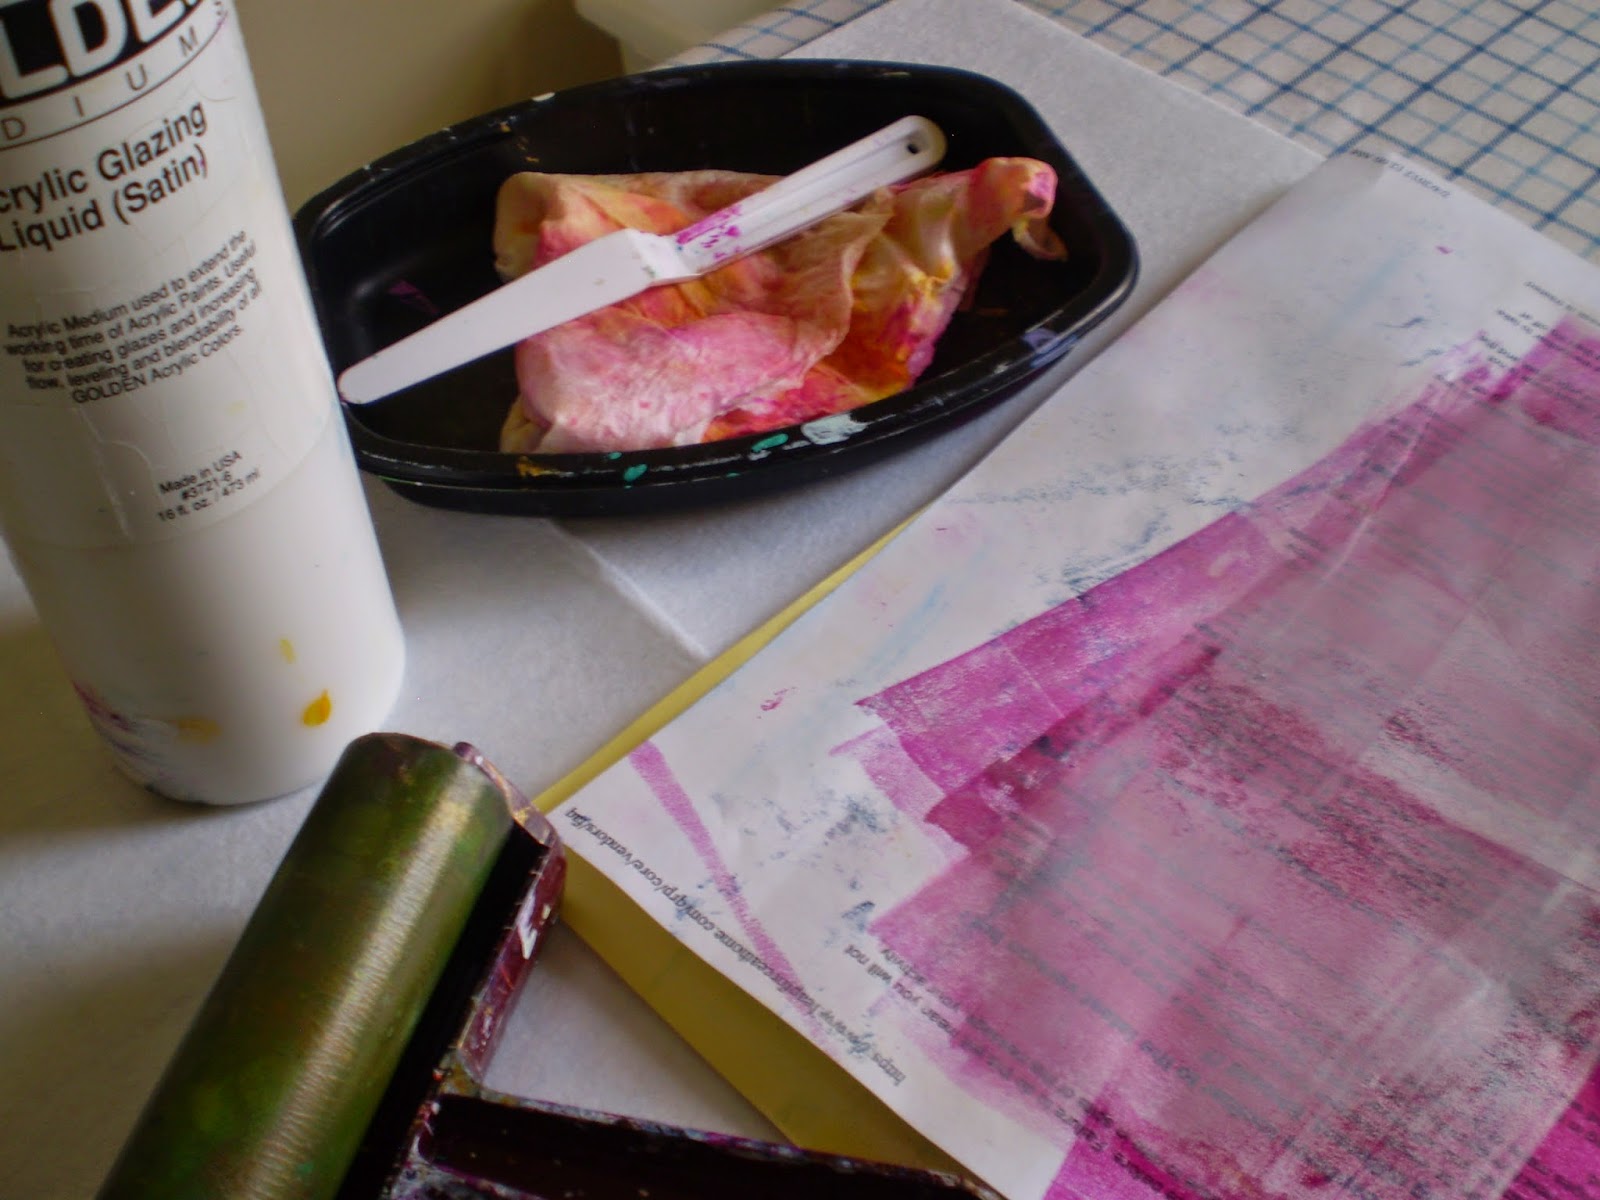 |
| Golden glazing liquid, an old food tray, damp paper towel, palette knife, scratch paper, and a soft rubber brayer. |
 |
| A series of first-pull prints on one sheet. I was a bit more careful about print registration on this sheet. |
The series of prints below has a Plan B print as the final layer.
Plan B prints are made by putting a thick layer of white or light heavy-bodied paint onto the leftover paint on the Gelli plate. Do the first pull on copy paper or cheap card stock. The first Plan B print will be all or mostly white paint. The second pull will bring up most of the remaining paint on the plate, including the colors and patterns under the white paint. Plan B prints make a nice final layer or can stand alone. Plan B and ghost prints are often prettier than the first prints, IMO. :)
 | |
| A series of ghost prints, with a Plan B print as the final layer. |


Comments
Post a Comment